Most people have the occasional personal demon hidden away deep in their substorage folder. For some it is a past indiscretion or a fondness for a particular concoction. For others it is a matter of faith or the lack thereof or perhaps an obsession with career, hobby or pursuit. It probably comes as no surprise that for me it deals with furniture.
I have a storage room full of personal furniture demons, some are mere ghosts of furniture items from my past, both personal and professional, that have mostly been expunged and a few others that have not. Here are a couple of my personal demons, one from the distant past and one from the recent future.
The first one from the distant past involves a nice mahogany Colonial Revival rocker that arrived at my shop in a box, a charity drop-off by a frustrated customer who could no longer deal with his demons about the chair, especially since he broke it to start with and royally messed up the repair. He consigned it to me to dispose of as I saw fit. I liked the chair and decided to take it on as a personal project.
The original phase of strip, reassembly and refinish went well enough until I got to the carved splat. This nicely done piece had an urn with a depiction of some leaves on each side of three acorns. The problem was that at one time there had been two more leaves behind the acorns, one on each side of the central figure. But one of the leaves was broken off leaving its mate sticking up forlornly by itself behind the acorn.
Had this been on a frieze panel that I could work on only from the front it wouldn’t have been a problem. Simply install a precut piece of wood and carve the new leaf. No big deal. But this had to be invisible from the back also since the chair could be seen from many angles.
I let this demon grow to the point that it delayed the restoration of the chair for about a year while I thought about it. Finally Gail said, “Just remove the extra leaf.” Brilliant. I removed the odd leaf, restored the chair and today nobody would ever know that the orphan leaf ever existed. Demon expunged.
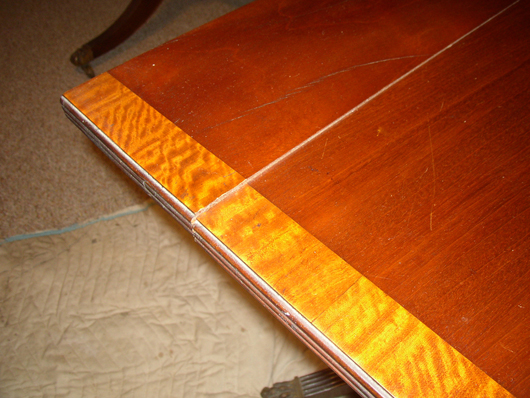
Another more recent demon involved my dining room table. I know that it is an assembled piece from at least two tables but parts of it are old, 18th century English, so I am still partial to it. The problem is that each half of the tilting top surface is made of two boards, a very large piece of mahogany and a smaller piece added to the original piece. The construction appears to be old and is perfectly matched on each side of the table.
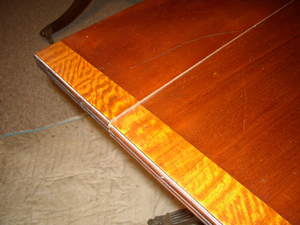
The demon first appeared about seven years ago in the form of a small crack at the joint of the two pieces of mahogany on one end of the table. It wasn’t broken and it wasn’t a check. The glue joint just started to open up. I have done this repair hundreds of times for customers without hesitation. If the table is rectangular there is no problem, just glue it and clamp it and done. But my table has a rounded end. This makes clamping a little more awkward since there were no parallel sides to clamp to. To complicate matters, the joint was not only open, one of the boards had warped slightly and was above the plane of the other board.
This problem, too, I had encountered many times for customers. It is no great feat to create the parallel sides needed for clamping. The problem was that usually when I did this for a customer, the table was also being refinished so I had lots of leeway and the repair was never done onsite in the customer’s dining room.
In my case the problem was I had to work around the existing finish on this table, I had to do the work onsite in my dining room and this was MY table! That demon haunted me every time we used the table – rarely but usually with company or family for holidays. I always worried about the table falling apart but I just wasn’t ready to attack that demon yet.
Then one day, out of the blue, after seven years, I decided today was the day, no matter what. In this instance I decided I couldn’t use hide glue because of the requirement of bringing the warped piece back into the correct plane. I needed more open time so I decided to use my old friend Franklin’s Tite-Bond, a yellow aliphatic resin wood glue with a decent open time. Since I had to work both horizontally, to close the gap, and vertically to align the warped piece, I had to work in stages to set the clamps and the bring pressure on the entire assembly gradually and evenly.
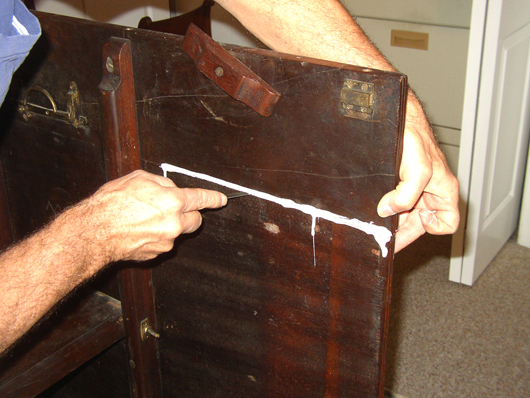
First, I opened the crack slightly by inserting a small wooden wedge. Then I cleaned out the old glue as well as I could using a small razor knife. This was important since glue doesn’t stick to glue. Then working from both the top and underneath I squeezed glue into the crack and spread it evenly using a thin blade glue knife, wiping off the excess with a damp rag.
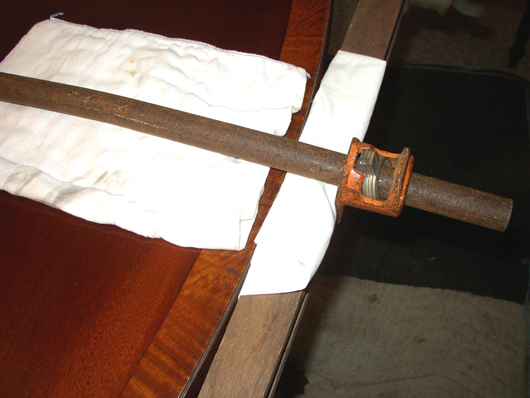
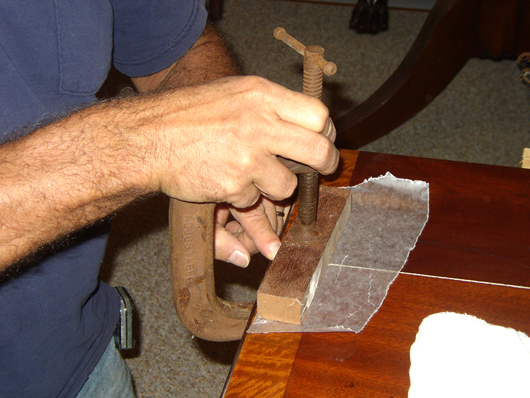
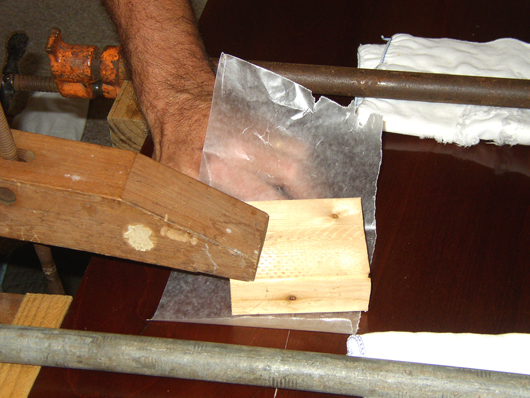
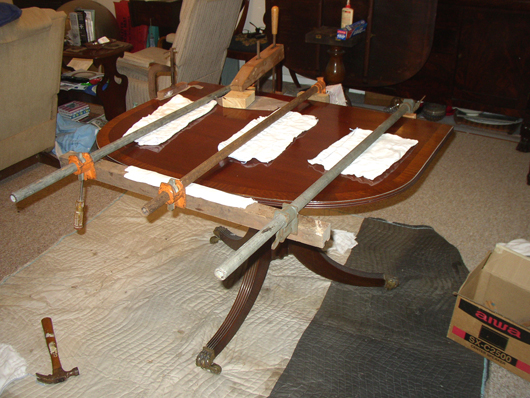
Then I had to create the parallel clamping sides. Clamping an oak table runner to the center of the round end using a pipe clamp was the start, being careful to cushion the oak with a rag so as not to mar the table. Then clamps were applied snugly, but not too tight, from each end of the oak piece to outer edges of the center section of the table, using wood blocks to cushion the wood from the clamp faces. Rags under each pipe clamp guarded against any damage from a slipping clamp. The slight pressure of the pipe clamps squeezed out glue from the joint, which had to be cleaned up before bringing the joint into level. Using a C-clamp, a block of wood with a smooth face was positioned over the crack at the edge of the table. Another block was used below with wax paper under each block to prevent the blocks from adhering to the table. Moderate pressure brought the joint to level. A deep-throated Jorgensen-style wooden clamp was used toward the center of the table at the other end of the joint to assure its level state.
Slowly all the clamps were tightened evenly in succession until the open joint was tight and level. The joint had to checked by feel to make sure it was level at all points along it. Then any excess glue squeezed from the joint was cleaned up with a damp rag both underneath and on top of the table.
The next day the clamps were removed, excess dried glue was removed and the demons were sent home, leaving a tight level joint and a relieved owner.
Send comments, questions and pictures to Fred Taylor at P.O. Box 215, Crystal River, FL 34423 or email them to him at info@furnituredetective.com.
Visit Fred’s website at www.furnituredetective.com. His book How To Be a Furniture Detective is available for $18.95 plus $3 shipping. Send check or money order for $21.95 to Fred Taylor, P.O. Box 215, Crystal Fiver, FL, 34423.
Fred and Gail Taylor’s DVD, Identification of Older & Antique Furniture ($17 + $3 S&H) is also available at the same address. For more information call 800-387-6377, fax 352-563-2916, or info@furnituredetective.com. All items are also available directly from his website.
ADDITIONAL IMAGES OF NOTE
